
Top 10 DIY Drywall Repair Tips and Tricks
Check out these drywall repair tips for DIYers
Drywall repair is an often daunting task for homeowners, but it doesn’t have to be. With the right tools and a little bit of know-how, you can easily tackle any drywall repair job. To help you get started, we’ve compiled a list of 10 of the best DIY drywall repair tips and tricks. From the essential tools you’ll need to the painting of the repaired area, this comprehensive guide will make sure you’re ready to tackle your next drywall repair. First up, you’ll need the right tools to get the job done. Essential tools for drywall repair include a putty knife, joint compound, drywall tape, and sandpaper. Specialty tools such as a drywall trowel and corner bead can also be useful. You can also use everyday tools such as a drill, hammer, and screwdriver. Once you have the necessary tools, you’ll need to prepare the area for repair. This involves cleaning the area and removing any damaged drywall. Make sure to measure and mark the area so you know exactly where to apply the joint compound. When it comes time to apply the drywall compound, you’ll want to apply the first coat, then the second coat. This will ensure that the repair is even and smooth. After the second coat of drywall compound is applied, it’s time to sand and finish. Using a fine-grain sandpaper, sand the compound until it is smooth and even. Finally, you’ll need to paint the repaired area. This involves priming and sealing the drywall, as well as applying the paint. To ensure the best results, you’ll want to use a high-quality paint that is suitable for use on drywall. DIY drywall repair can be quite intimidating, but it doesn’t have to be. With the right tools and a little bit of know-how, you can easily tackle any drywall repair job. By following the 10 tips and tricks outlined in this article, you’ll be well on your way to becoming a pro at DIY drywall repair. Remember to always take safety precautions and use the proper tools when working on drywall repair projects. Good luck!
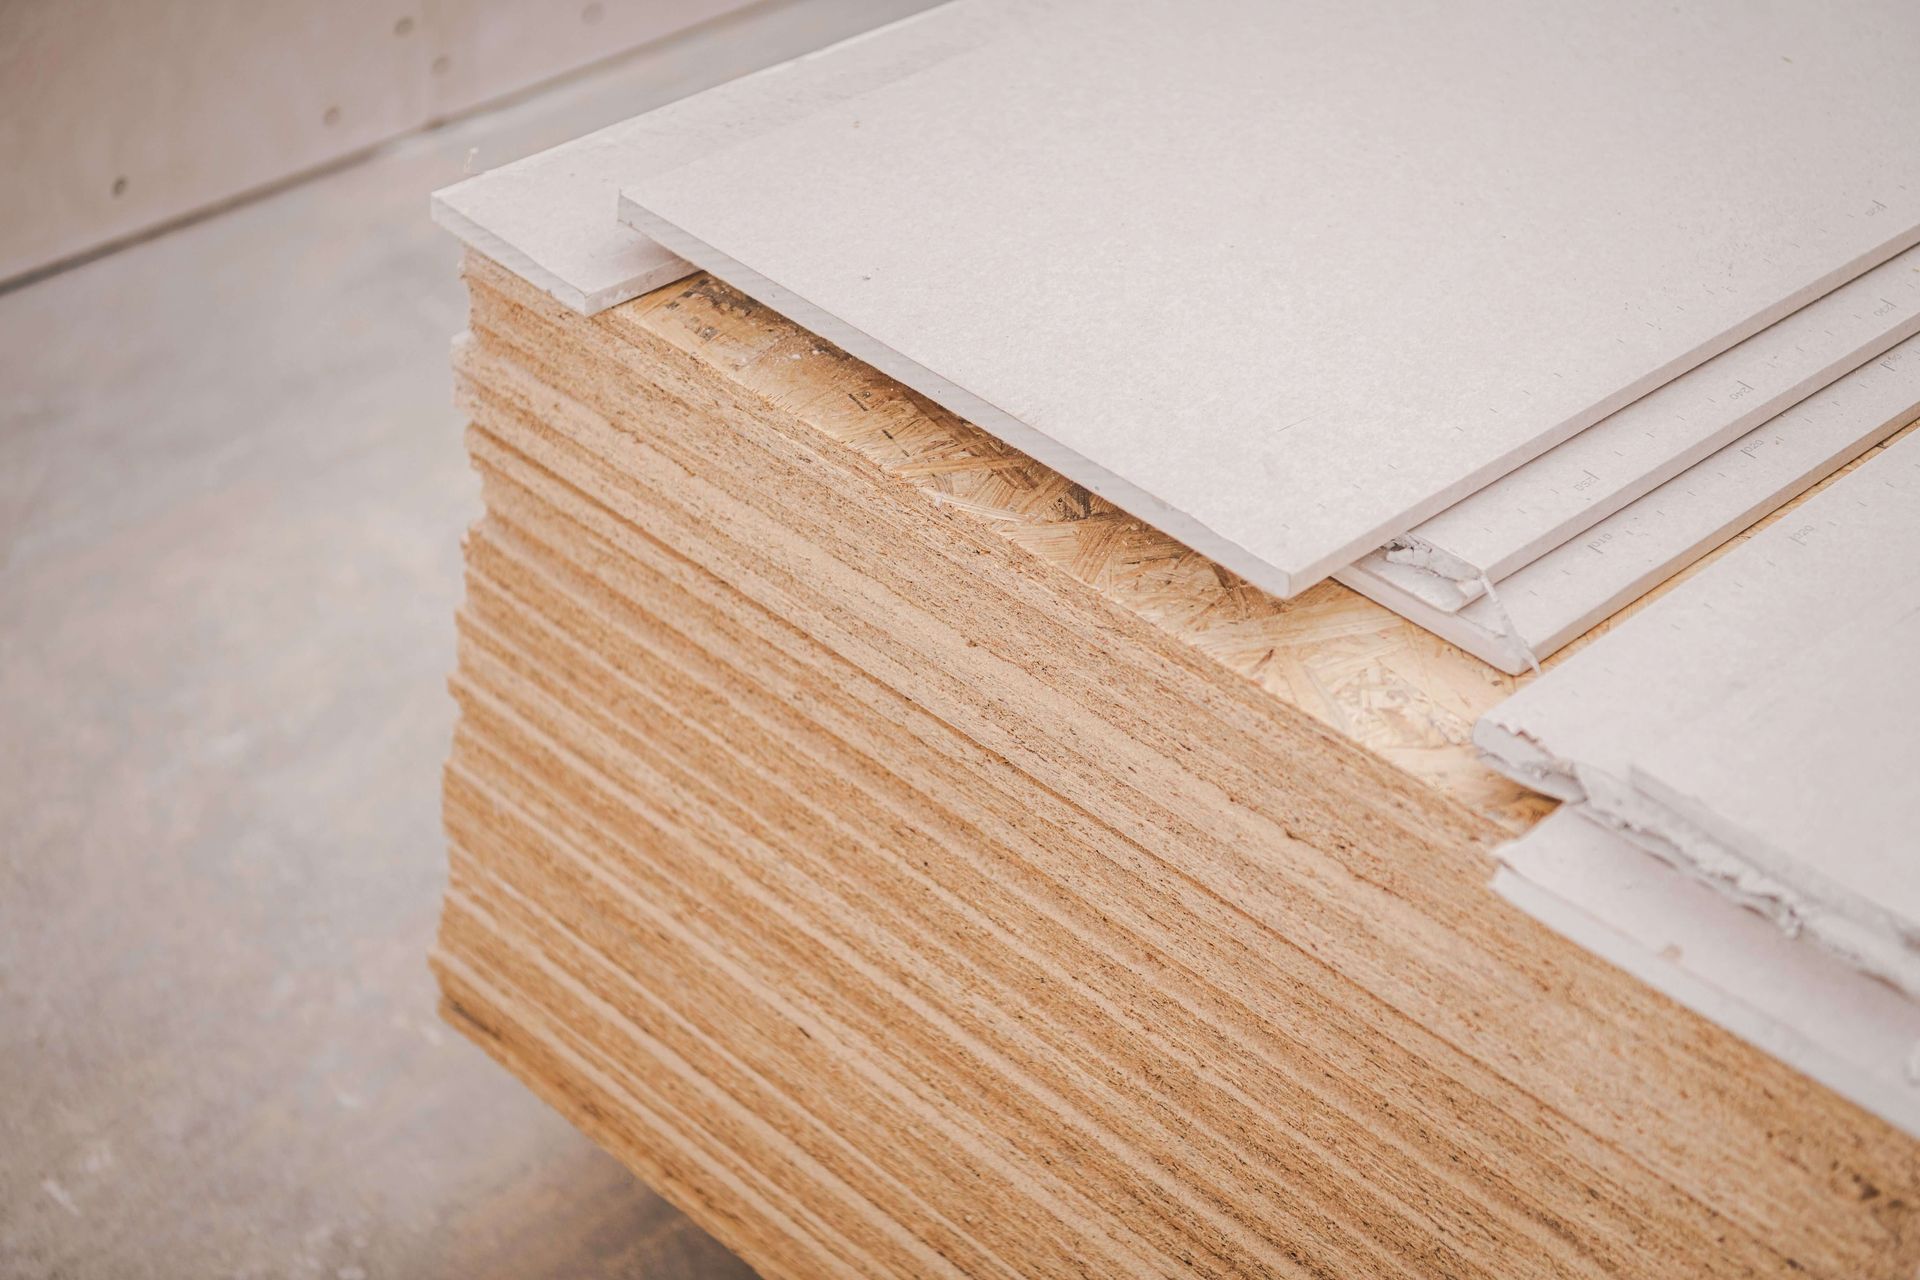
Essential Tools for Drywall Repair
When it comes to drywall repair, having the right tools is essential for getting the job done. While some specialty tools are required for the task, many everyday tools can also be used to make the repair easier. When it comes to specialty drywall tools, a few items will help you get the job done quickly and efficiently. A drywall jab saw is designed specifically to cut through drywall, allowing you to remove damaged sections. A putty knife is also a must-have tool for inserting drywall compound into the repair area. Drywall taping knives are also essential for getting into tight spots and ensuring a smooth finish. Finally, a sanding block or sandpaper will help you smooth out the compound for a polished look.When it comes to everyday tools, many items you already have in your toolbox can come in handy. A utility knife can be used to score the drywall before cutting with a jab saw. A level is a great tool for ensuring the repair area is straight and even. A screwdriver can be used to remove any screws that may be in the drywall. A putty knife can also be used to spread the drywall compound. A damp cloth or sponge is great for cleaning the area after the repair is complete. Finally, a paintbrush or roller is necessary for applying primer and paint to the repaired area.Having the right tools is essential for a successful drywall repair. Make sure you have all the necessary specialty and everyday tools before you begin your project.
What Specialty Tools Are Needed
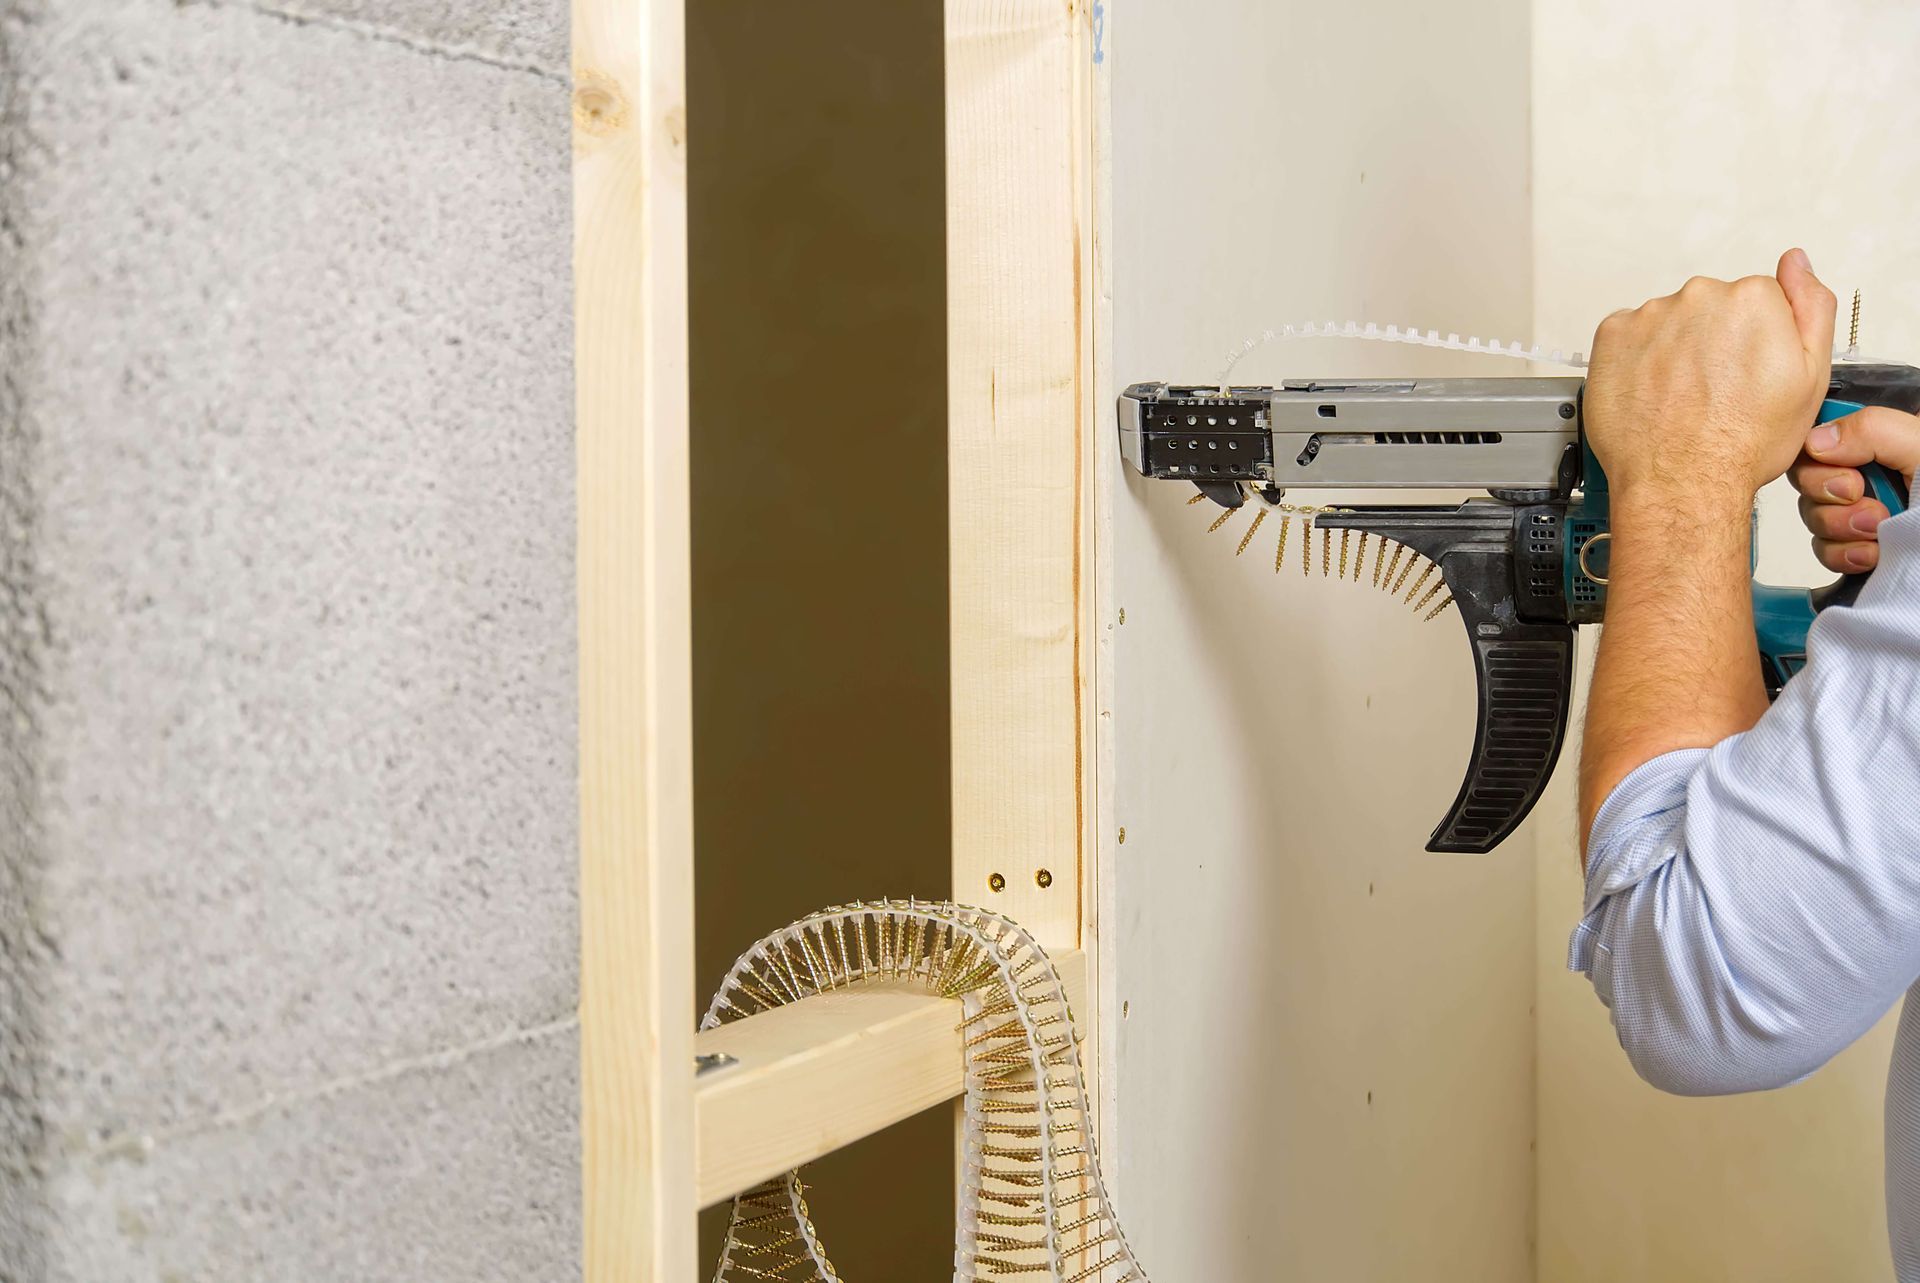
When it comes to DIY drywall repair, the right tools are essential to the job. When it comes to specialty tools, there are a few items that are necessary for drywall repair. The first is a drywall knife. This tool is used to apply and spread drywall compound. They come in a variety of sizes and should be chosen based on the project size. A larger knife is better for larger projects while a smaller knife can be used for smaller repairs. The next essential tool is a sanding block. This is used to sand down the drywall compound after it has been applied. It is important to use a sanding block to ensure even sanding and a smooth finish. Another tool that is useful when it comes to drywall repair is a drill. A drill can be used to drill holes for screws and to attach the drywall onto the wall. Drills come in different sizes and should be chosen based on the size of the project. The last essential tool is a putty knife. This tool is used to spread and apply drywall compound. Putty knives come in a variety of sizes, so it is important to choose the right size for the job. These are the essential tools needed for DIY drywall repair. While there are other tools that may be needed depending on the size and scope of the project, these are the basics that are needed for most DIY drywall repairs. With the right tools, any DIYer can successfully repair drywall.
What Everyday Tools Can Be Used
When it comes to DIY drywall repair, there are some everyday tools that you can use to make the job easier. A putty knife, a drywall saw, a utility knife, a drill, a hammer, a stud finder, a tape measure, a level, and a screwdriver are all essential tools for the job. Putty knives are used for spreading and smoothing drywall compound, and come in a variety of sizes. A drywall saw is used for cutting the drywall, while a utility knife is used for scoring and cutting the tape. A drill is used to make holes in the drywall, while a hammer is used for tapping nails and screws into place. A stud finder can be used to locate studs in the wall. A tape measure is used to measure the area that needs to be repaired, and a level is used to make sure the patch is even. Finally, a screwdriver is used to secure the patch to the wall. Using the right tools for the job can make drywall repair much easier and faster. Make sure you have all of the essential tools on hand before starting your project, and you’ll be well on your way to a successful repair job.
Preparing the Area for Repair
When preparing a drywall area for repair, it is important to take the time to properly clean, measure, and mark the area. This will help ensure that the repair job is done correctly and with as little disruption to the surrounding area as possible. Cleaning the Area Before any repairs can be made, the area must be thoroughly cleaned. This is an important step because it helps to remove any dirt, dust, or debris that can interfere with the repair process. Use a vacuum or damp cloth to remove any dust or debris from the area. If the area is heavily soiled, use a mild detergent to clean it. Removing Damaged Drywall If the area to be repaired has damaged drywall, it will need to be removed before the repair process can begin. Begin by using a utility knife to cut around the damaged area. Cut as close to the edges of the drywall as possible without damaging the surrounding area. After the damaged area has been cut out, use a pry bar to gently remove the drywall. Measuring and Marking: Once the damaged drywall has been removed, it is time to measure and mark the area for repair. This is an important step that helps ensure the repair job is done correctly. Use a ruler or measuring tape to take accurate measurements of the area, then mark the area with a pencil or marker. Having a well-prepared area for repair is key to a successful drywall repair job. Taking the time to clean, measure, and mark the area will help ensure that the repair process goes smoothly and that the finished product looks great.
Cleaning the Area
When cleaning the area for drywall repair, it’s important to remove any dirt, dust, or debris from the area. Start by vacuuming away any loose material. You may want to use a shop vac if the area is extra dusty or has large pieces of drywall. If the area is extremely dirty, it’s a good idea to use a cleaning solution to remove any stubborn dirt or grime. You’ll want to use something mild like warm soapy water or a mild detergent. Avoid any harsh cleaning solutions or chemicals as they can damage the drywall. Once the area is clean and free of any dirt and dust, you’ll want to dry it off with a clean cloth. Make sure the area is completely dry before proceeding with the repair. If you’re in a hurry, you can use a fan or blow dryer to quickly dry the area.It’s also important to remove any wallpaper or old paint from the area. You can use a putty knife or other scraping tool to remove any leftover adhesive. If you have any stubborn wallpaper, you may need to use a wallpaper steamer to loosen the adhesive. Once the adhesive is gone, you can wipe the area off with a damp cloth.Once the area is cleaned and prepped, you’ll be ready to start the drywall repair. Make sure the area is completely dry before beginning the repair. This will ensure that the drywall compound adheres properly and that the repair will last.
Removing Damaged Drywall
When removing damaged drywall, it is important to work carefully and cautiously. Start by using a utility knife to cut the damaged drywall into smaller sections. This will make it easier to remove without damaging any surrounding areas. Be sure to wear protective gear like safety glasses and gloves when you are cutting and removing the drywall. Next, use a pry bar to gently remove the damaged drywall. If the drywall is too difficult to remove with a pry bar, use a drill to make holes in the drywall and then use the pry bar to remove the pieces. Be sure to wear protective gloves and safety glasses when using the drill. If necessary, use a hammer to break up the remaining pieces of drywall. Again, be sure to wear protective gear when using a hammer. Put the pieces of drywall into a trash bag and seal it tightly. After all of the drywall is removed, inspect the area for any nails or screws that may have been left in the wall. If necessary, use a drill to remove any remaining nails or screws. Finally, vacuum the area to remove any remaining drywall dust and debris. When finished, the area should be completely free of damaged drywall.
Measuring and Marking
Measuring and marking are two important steps when it comes to repairing drywall. Before beginning any repair work, it’s important to measure the damaged area accurately and mark it clearly. This will help to ensure that the repair job is done correctly and efficiently. To measure the area, use a tape measure and note the exact dimensions of the damaged area. Make sure to measure the height and width of the area, as well as the thickness of any drywall that needs to be replaced. Once the measurements are taken, mark the area with a pencil. It’s important to use a pencil and not a pen or marker, as the marks can easily be erased if needed. Once the area is measured and marked, it’s time to begin the repair work. Be sure to follow the directions provided with any specialty tools you may be using. If you’re using everyday tools, such as a hammer and saw, make sure to use them safely and follow the instructions on the packaging for proper use. It’s also important to remember that drywall repair can be a bit messy, so it’s important to wear protective clothing and goggles when working with drywall compound. This will help to keep you safe and protect your clothing from any dust or debris that may be created during the repair process. By taking the time to accurately measure and mark the damaged area, you can be sure that your drywall repair job will be done correctly and efficiently. By following a few simple steps, you can ensure that your drywall repair project is done properly and safely.
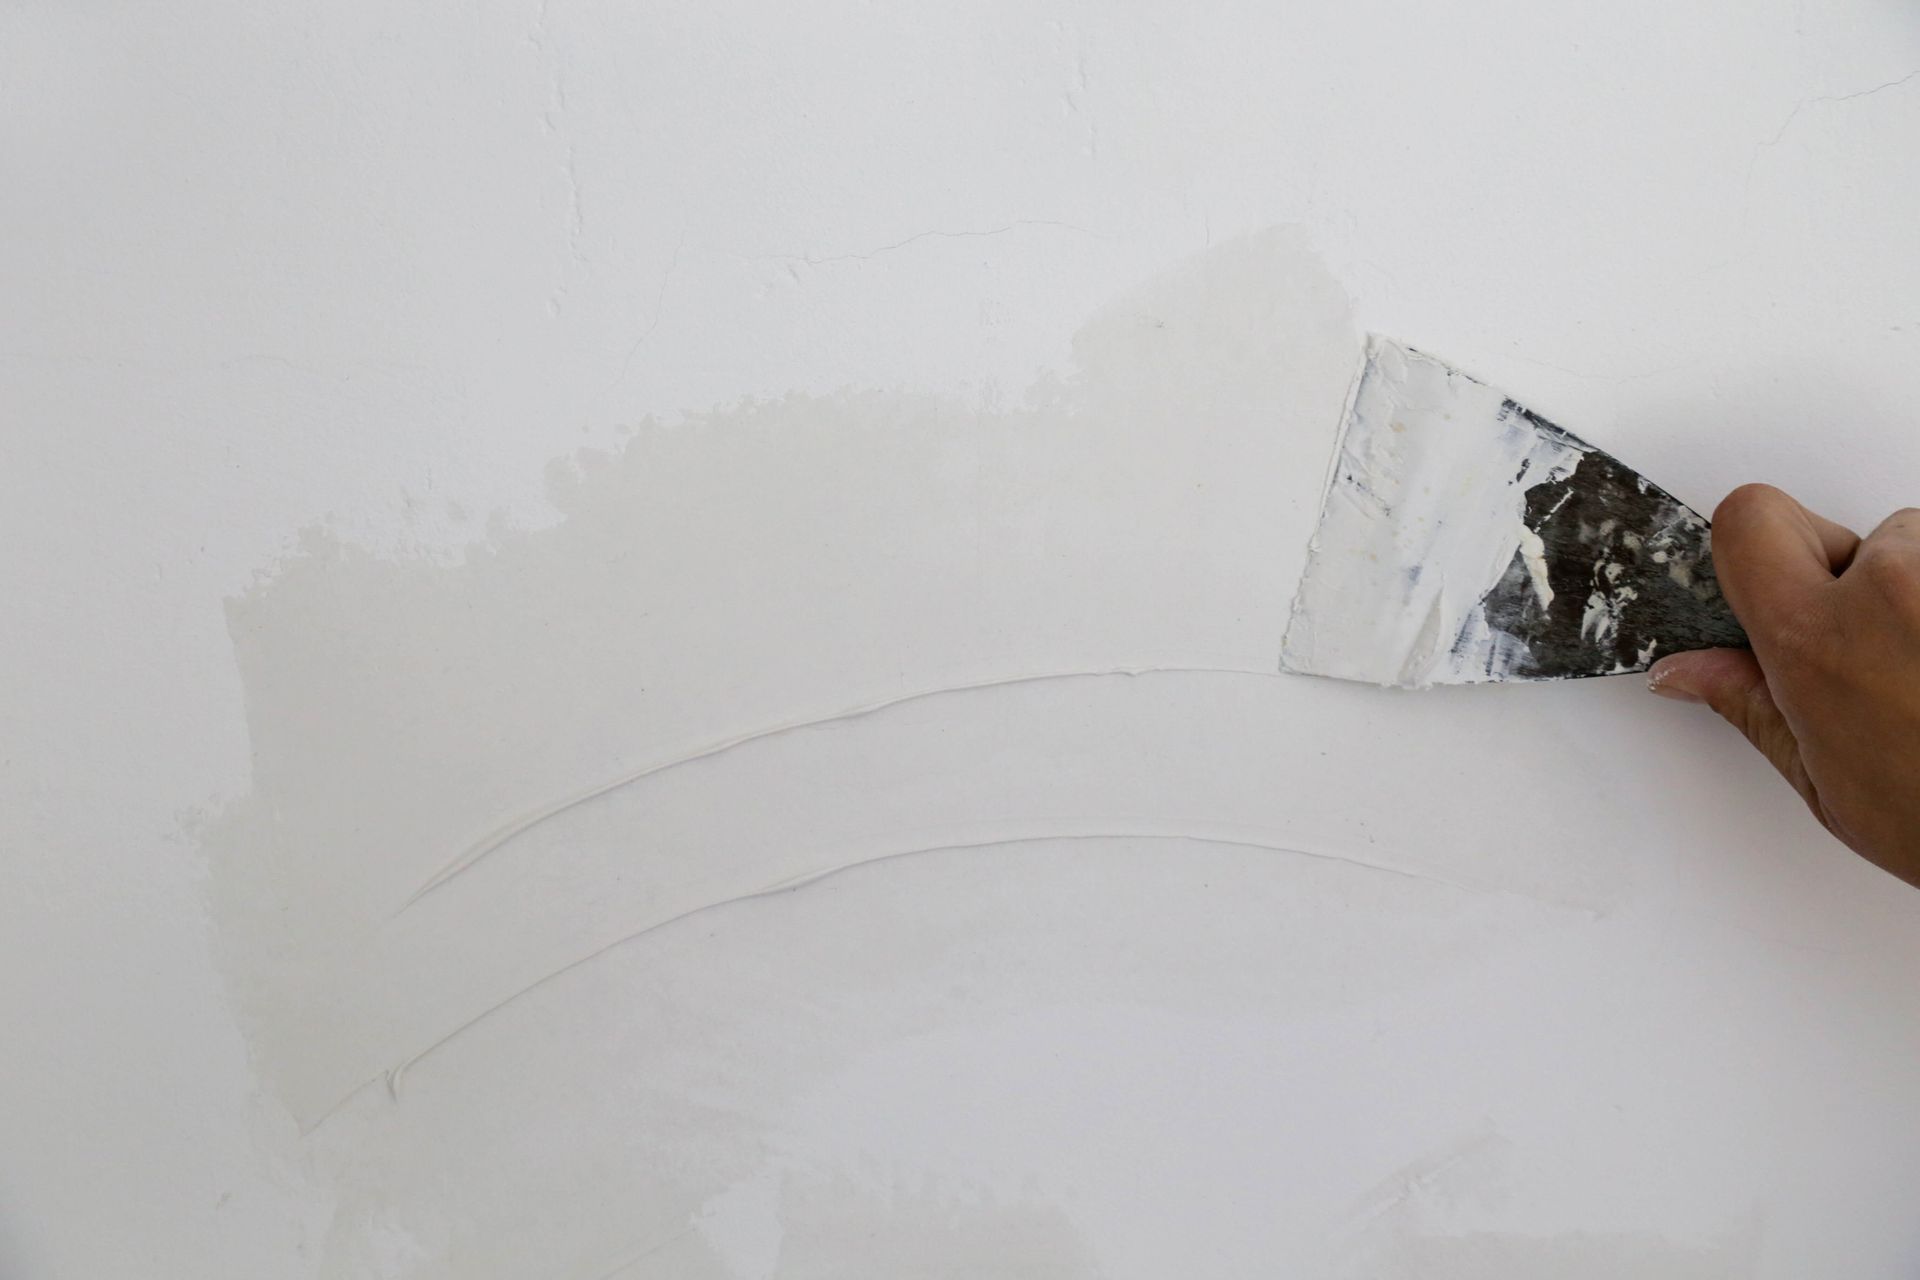
Applying Drywall Compound
Drywall compound is the essential material for any drywall repair job. It is used to fill in cracks, patch holes, and even level out imperfections in the wall. Applying drywall compound is a relatively straightforward process, but there are a few key steps that must be followed in order to achieve the best results. Before applying any drywall compound, it’s important to make sure the area has been prepped properly. Make sure to clean the area with a damp cloth, scrape off any loose particles, and remove any damaged drywall. Once the area is clean and dry, use a tape measure and pencil to mark the area where the compound will be applied. When it comes to applying the drywall compound, it’s important to use the right materials. For best results, use a 6” or 8” joint knife and a 10” or 12” taping knife. Start by scooping a small amount of drywall compound onto the joint knife and spread it onto the wall. Try to make the layer of compound as even as possible. Once the first layer of compound has been applied, use the taping knife to spread the compound over a larger area. Make sure to apply an even layer of compound and to feather the edges. This will help to create a smooth, even finish. Once the second layer of compound has been applied, it’s important to let the area dry completely before proceeding with the next step. This can take anywhere between 12-24 hours, depending on the temperature and humidity of the room. Once the area has dried, it’s time to start sanding. Use a medium-grit sandpaper to sand down the area, making sure to feather the edges. This will help to create a smoother finish. Once the sanding is complete, use a damp cloth to wipe away any dust and debris. Once the area has been sanded, it’s time to apply a coat of primer and sealer. This will help to protect the repaired area from moisture and ensure a longer-lasting repair job. Make sure to use a high-quality primer and sealer for best results. Finally, it’s time to paint the repaired area. Use a high-quality paint that is designed specifically for drywall repair. Make sure to apply two coats of paint, letting each coat dry completely before applying the next. These are the essential steps for applying drywall compound and painting the repaired area. Following these steps will help to ensure a long-lasting, professional-looking repair job. With patience and practice, anyone can successfully complete a drywall repair job.
Applying the First Coat
When it comes to applying the first coat of drywall compound, there are several steps that should be taken to ensure a successful repair. First, make sure to use the right tools and materials for the job. A drywall knife, trowel, and a bucket of joint compound are all necessary for this step. Before beginning, make sure the repair area is clean and free of debris. If there is any loose material that needs to be removed, use a putty knife or a small trowel to gently scrape away the damaged drywall. Once the area is clear, use a piece of sandpaper to lightly sand the surface and remove any remaining debris. Next, fill the repair area with drywall compound. To do this, use the drywall knife to scoop the compound out of the bucket and apply it to the repair area. Make sure to spread the compound evenly, filling in any gaps or cracks. Once the entire area is filled, use the trowel to smooth and flatten the compound, making sure to remove any excess material. Finally, use a damp sponge to lightly press the compound and remove any air bubbles. Make sure to apply only gentle pressure and avoid pushing too hard, as this could cause the compound to crack or break. Once the surface is even, allow the compound to dry before moving on to the next step. These steps should ensure that the first coat of compound is applied properly and will be ready for the next step in the drywall repair process. With the right tools and materials, and a bit of patience, you can easily apply the first coat of drywall compound and be on your way to a successful repair.
Applying the Second Coat
When applying the second coat of drywall compound, you will want to start in the same way as the first coat. Spread the compound out evenly and use the drywall knife to make sure it is level. If there are any areas that need extra attention, focus on those areas first. If you are using a pre-mixed compound, you will need to mix it with water according to the instructions on the packaging. Once the second coat of compound is applied, you will need to let it dry for several hours, or even overnight. You may need to apply a third coat of compound if the area is still uneven or if some of the joints need additional coverage. When sanding the second coat of drywall compound, you will need to use a fine-grit sandpaper. This will help to smooth out any bumps and ridges and make the area look more even and polished. Use a sanding block or pole sander to make sure the area is even. You may also want to use a damp cloth to wipe away any residue and dust from the sanding process. When applying the second coat of drywall compound, it is important to make sure you are working in a well-ventilated area. The compound is made up of chemicals that can be hazardous to your health if you are exposed to them. Wear a face mask and protective clothing to make sure you are not inhaling any of the fumes.Finally, make sure you are not applying too much compound. This can lead to cracking or other damage to the drywall. Keep your strokes even and use a light hand when applying the compound.By following these tips for applying the second coat of drywall compound, you can ensure that your DIY drywall repair job looks professional and lasts for years to come.
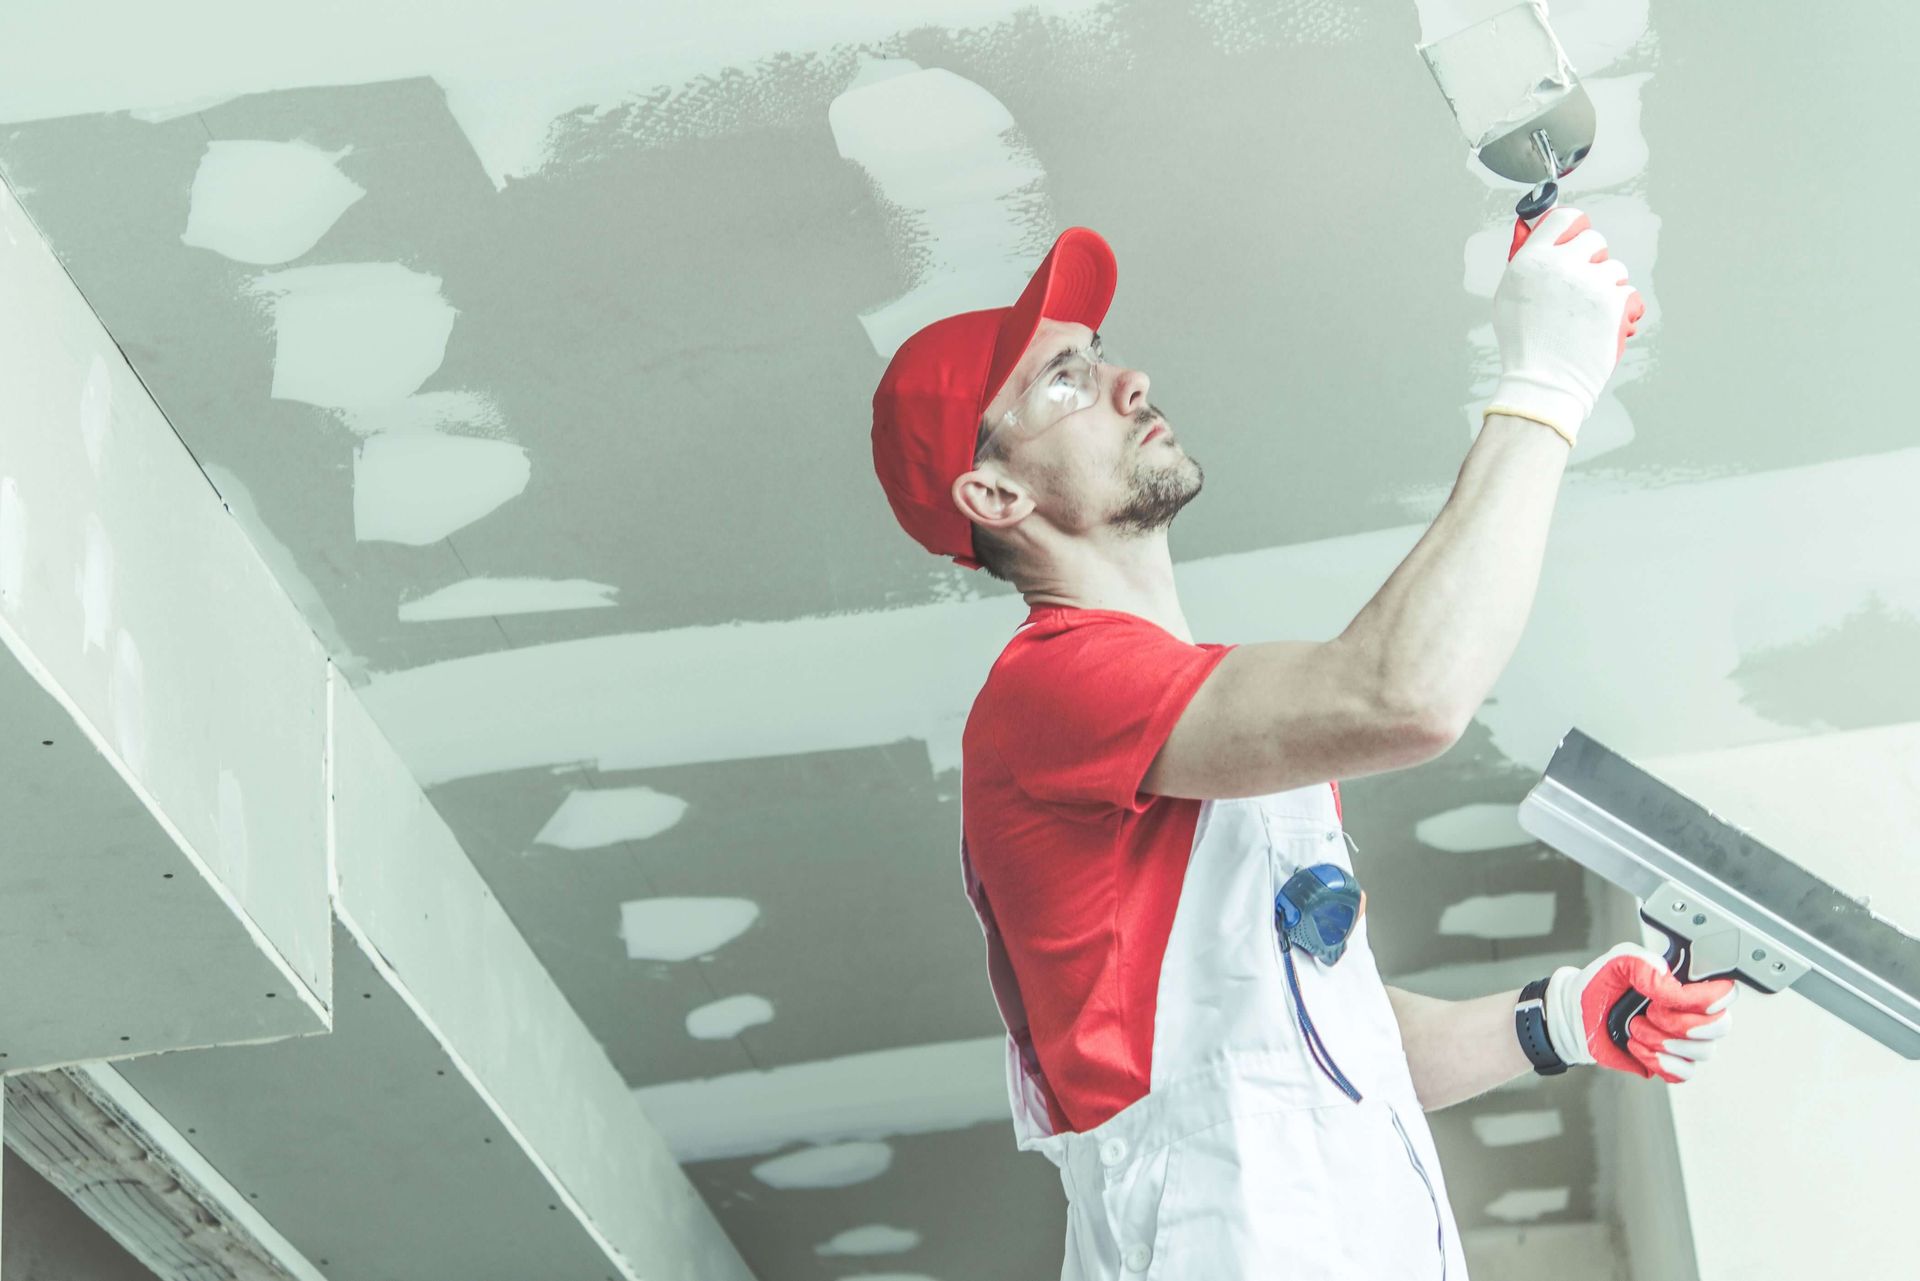
Sanding and Finishing
Sanding is an essential step in the drywall repair process. It helps to create a smooth, even surface, which will make it easier to apply paint after the repair is complete. Before you begin sanding, you'll need the right tools. An electric sander is the most effective tool for this task, but it can be expensive and difficult to manage. A sanding sponge or block can also be used, but it can be slow and tiring. If you're willing to put in a bit of extra effort, you can use a sandpaper and sanding block instead. When you're ready to begin sanding, make sure to wear a dust mask and goggles for safety. Start by sanding the entire surface with a medium grit sandpaper. This will help to smooth out any rough spots and remove any excess drywall compound. Work from the center of the area outward, and be sure to sand in even strokes. After you've finished sanding with the medium grit, switch to a fine grit sandpaper and repeat the process. This will help to create an even smoother surface. Once you've finished sanding, you'll need to clean up the dust. Vacuum the area with a shop vacuum, and use a damp cloth to wipe away any remaining dust. This will help to prevent any dust from settling on the freshly sanded surface. When you're finished sanding, it's time to apply a finish to the wall. If you're using a primer, apply it first and allow it to dry before moving on to the paint. Paint can be applied with either a brush or a roller. For best results, use a high-quality paint and follow the manufacturer's instructions. Once the paint has dried, you can apply any additional finishes. This could include a gloss or matte finish, a faux finish, or a decorative texture. Sanding and finishing are the last steps in the drywall repair process. With the right tools and techniques, you can create a smooth, even surface that looks as good as new. Remember to wear safety equipment when sanding, and take your time to make sure the job is done right. With a little patience and effort, you can get professional-looking results.
Sanding the Drywall Compound
Sanding drywall compound is a necessary step in the repair process. It’s important to sand the compound to ensure that the surface is smooth and even. Sanding the compound also helps to bond the compound to the wall, so that it will last longer. When sanding the drywall compound, it’s important to use the right tools and techniques. The best tool for sanding drywall compound is a sanding sponge. Sanding sponges are specially designed to be used on drywall, and they provide a more even sanding than a traditional sandpaper. Sanding sponges are also easier to use and more comfortable on the hands. When sanding with a sanding sponge, it’s important to use light, even strokes. You should also use a circular motion when sanding, to ensure that the compound is evenly sanded. When sanding, it’s important to move the sanding sponge in the same direction as the drywall texture. This will help to maintain the texture of the wall. When sanding the compound, it’s important to use a vacuum cleaner to remove the dust and debris. This will help to ensure that the surface is clean and free of dust before applying the final coats of paint or primer. It’s also important to use a damp cloth to remove any remaining dust after sanding. This will help to ensure that the surface is free of dust and debris before applying the final coats of paint or primer. When sanding the drywall compound, it’s important to use a light touch. This will help to ensure that the surface is even and smooth. It’s also important to sand lightly, as sanding too aggressively can leave deep marks in the compound. When sanding drywall compound, it’s important to wear a safety mask and goggles. This will help to protect you from the dust and debris that can be created when sanding. It’s also important to wear gloves to protect your hands from the sharp edges of the sanding sponge. Sanding drywall compound can be a time consuming process, but it’s an important step in the repair process. Taking the time to sand the compound correctly will help to ensure a successful repair. By using the right tools, techniques, and protective gear, you can ensure that your drywall repair job will be a success.
Finishing the Repaired Area
When finishing the repaired area, the drywall repair job can be completed with fine sandpaper, a sanding sponge, or a power sander. Sandpaper should be used to lightly sand the patched area and the surrounding area to achieve a smooth surface. A sanding sponge can also be used to get into tight corners and hard-to-reach areas. A power sander should only be used in small, confined areas. When sanding, it is important to use light, uniform strokes and to keep the sander moving. Over-sanding can cause damage to the drywall, so it is important to take it slow and sand only as much as necessary. When the surface is smooth, it is time to clean up the area. Use a vacuum to remove dust and debris from the area and then wipe down the surface with a damp cloth. To finish the repair, you will need to apply a thin layer of drywall compound to the area. Use a putty knife to apply the compound in thin coats, and let each coat dry before applying the next. When the repair is complete, it should be sanded again with fine sandpaper to ensure a smooth finish. Once the repair is finished and sanded, it is time to prime and paint the area. To properly prime and paint the area, make sure to use a high-quality primer and paint that is designed for use on drywall. Start by applying a thin coat of primer to the repair area and let it dry according to the manufacturer’s instructions. Then, apply a coat of paint, making sure to use even strokes and to apply the paint in thin coats. Allow the paint to dry and then apply a second coat if necessary. When finishing a DIY drywall repair, it is important to take safety precautions. Wear a dust mask when sanding to avoid inhaling any dust or debris. Wear protective eyewear to avoid getting any drywall dust or debris in your eyes. Wear gloves to protect your hands from the chemicals in the drywall compound and paint. Finally, make sure the area is well-ventilated, and open windows or use fans to move air throughout the room. Finishing a DIY drywall repair is an important part of the project. By taking the time to properly sand and finish the area, you can ensure that the repair job is done right and that the repair will last for years. With the right tools, supplies, and safety precautions, completing a DIY drywall repair job can be a rewarding experience.
Painting the Repaired Area
When it comes to painting the repaired area, there are a few basic steps to follow. First, you'll want to prime and seal the area with a good quality primer. This will help to ensure that the paint adheres properly and lasts longer. Once the primer has dried, you can apply the paint. It's best to use a roller so you can get a nice even coverage. If you're working with a textured wall, you may need to use a brush to fill in the grooves. Once the paint has dried, you may want to add a few coats of a clear sealant to protect the area from moisture. When it comes to choosing paint, you'll want to make sure that you get a good quality paint that is designed for drywall repair. It should be able to stand up to the moisture in the area and be able to resist mildew and mold. You'll also want to make sure that the color you choose matches the rest of the wall or the room. If you're working with a textured wall, you may need to use a textured paint to achieve the same look. When you're done painting, you'll need to clean up the area. Make sure to remove any paint that may have splattered or dripped onto other surfaces. You may also need to clean off any tools you used for the repair. Painting a repair area is often the final step in completing a successful DIY drywall repair job. If done properly, it can give your wall or ceiling a fresh, new look. But it's important to make sure you take the necessary steps to prepare the area, choose the right materials and tools, and take safety precautions to ensure you're working safely. With the right guidance and tools, you can achieve a professional-looking result without having to spend a fortune.
Priming and Sealing
Priming and sealing the repaired area is an important step in the drywall repair process. Not only does it provide a layer of protection for the repaired area, but it also helps to ensure a smooth, uniform finish. Before priming and sealing, it is important to make sure that any dust and debris has been removed from the repaired area. This can be done with a vacuum cleaner or a damp cloth. Once the area has been prepared, it is time to apply a primer. Primers are used to seal the drywall and help the paint to adhere to the surface. When selecting a primer, it is important to choose one that is designed for use on drywall, as this will ensure that the best results are achieved. When applying the primer, it is important to use a roller or brush to create a smooth, even finish. It is also important to let the primer dry completely before applying the paint. Once the primer has dried, it is time to apply the paint. When selecting a paint for the repaired area, it is important to keep in mind the type of drywall that is being used. If the drywall is new, it is best to use a latex-based paint, as this will provide the best finish. If the drywall is older, it is best to use an oil-based paint, as this will provide better coverage and protection. When applying the paint, it is important to use a roller or brush to create a smooth, even finish. It is also important to let the paint dry completely before applying a second coat. Once the paint has dried, it is time to apply a sealer. Sealers are used to protect the paint from damage caused by moisture and other environmental factors. When selecting a sealer, it is important to choose one that is designed for use on paint, as this will ensure that the best results are achieved. When applying the sealer, it is important to use a roller or brush to create a smooth, even finish. It is also important to let the sealer dry completely before applying a second coat. Once the sealer has dried, the area is ready to be enjoyed. Priming and sealing the repaired area is an important step in the drywall repair process. By following the steps outlined above, you can ensure that the repaired area is properly primed and sealed, and that the area looks great and lasts for years to come.
Painting
Painting the repaired area is the final step in the drywall repair process. To ensure that the repairs blend in seamlessly with the existing walls, it’s important to use the same type of paint and a similar color. Start by using a primer to seal the drywall compound and any other repairs. Primer will also reduce the number of coats of paint needed to cover the area. Use a brush or roller to apply the primer, and allow it to dry before continuing. When it comes to applying the paint, it’s best to use a roller for large areas and a brush for smaller areas. Rollers will cover the area quickly, while brushes will give you better control around edges and corners. For best results, roll on the paint in a W-shaped pattern, and brush in the area between the roller strokes. To avoid visible roller lines, use a high-nap roller. When using a brush, make sure to dip it into the paint several times, and always brush away from the edges of the area. For a smooth finish, brush out the paint with the grain of the wall. When painting, be sure to keep a wet edge and move quickly to avoid lap marks. This means that you should work in small sections, overlapping each section slightly as you go. This will ensure that the paint is applied evenly and smoothly. Once the paint has been applied, inspect the area for any missed spots. If you find any, use a small brush to touch them up. Once the area has been completely painted, allow it to dry completely before using the area.
Final Thoughts on DIY Drywall Repair
When tackling a DIY drywall repair project, it is important to remember a few important tips. Safety should always be the priority. Make sure to wear proper safety gear and take all necessary precautions when working with drywall and the tools required. It is also important to have the right tools for the job. If you don’t have the proper tools, it can be a difficult and time consuming task. Cleaning the area is also essential. Before any repair can be done, the area must be clear of any debris, dust, or dirt. This will help ensure that the repairs are effective and long-lasting. Be sure to measure and mark the area before beginning repairs. This will help make sure that the repair is even and straight. It will also ensure that you're not wasting any drywall or compound. Be sure to spread the drywall compound evenly. This will help ensure that the repaired area is smooth and even. Applying multiple coats of compound will help to achieve the best results. Sanding is also important when finishing a drywall repair project. Sanding the area smooth will help to ensure that the repair is even and the surface is smooth. Finally, painting the repaired area is important for a professional looking finish. Priming and sealing the wall before painting will help to ensure that the paint stays on and looks great. These simple tips and tricks will help you tackle any drywall repair project with ease. Just remember to stay safe, have the right tools for the job, measure and mark the area, spread the drywall compound evenly, sand the area, and finally prime and paint the repaired area. With these tips in mind, you will be able to successfully complete any drywall repair project.
Safety Tips
When it comes to DIY drywall repairs, safety is paramount. As with any home improvement project, there are certain basic safety protocols that should always be followed. While drywall repair is generally considered to be a relatively safe activity, it is still important to take the necessary precautions to avoid any potential injury. Before beginning any repair project, be sure to wear protective clothing such as safety glasses, gloves, and a dust mask. This will help to protect you from any flying debris or dust that may be created during the repair process. Additionally, it is important to make sure that the area is well-ventilated, as drywall dust can be irritating to the lungs if it is inhaled in large quantities. When it comes to the actual repair process, be sure to use a drill with the appropriate bit for the job. Using the wrong drill bit can cause drywall screws to be driven too deep or to strip out of the wall, which can lead to further damage. Additionally, be sure to wear gloves when handling drywall screws, as they can be sharp and cause cuts if handled without proper protection. When applying drywall compound, be sure to work in small areas at a time. Applying too much compound and working too quickly can lead to an uneven finish, which may require sanding and an additional coat of compound. Additionally, be sure to mix the compound according to the manufacturer's instructions and avoid over-mixing, as this can lead to a weaker compound that may not adhere properly. Finally, be sure to use only the tools that are necessary for the job. Avoid using any tools that are not specifically designed for drywall repair, as these can cause damage to the wall or ceiling. Additionally, be sure to use a ladder or step stool that can provide a stable platform for the repairs. By following these safety tips, you can ensure that your drywall repair project is a success. Remember to stay safe and take the necessary precautions to avoid any potential injury.
Important Things to Remember
When repairing drywall, it is important to remember a few key points. First, take the time to research the repair process thoroughly so you understand the steps needed to complete the job correctly. Second, take the necessary safety precautions when working with drywall, such as wearing safety goggles, gloves, and a dust mask. Third, make sure you have the right tools for the job. Specialty drywall tools can make the job easier and more efficient, and can help you avoid mistakes. Fourth, take your time and measure twice to ensure that the repair is even and accurate. Fifth, when applying the drywall compound, be sure to feather out the edges of the compound so it blends in with the surrounding drywall. Sixth, after applying the compound, it’s important to sand it down to ensure a smooth finish. Seventh, when painting the repaired area, always use primer and sealer to help the new paint adhere properly. Eighth, if you are using textured paint, make sure to apply it in even, small amounts to avoid lumpy or uneven textures. Ninth, if you are working in an area with existing paint, make sure to use a paint stripper to remove the old coat before you apply the new one. Finally, don’t forget to clean up all of your tools and materials once you are finished with the project. Taking the time to properly clean up after yourself can help to prevent any problems with the repair in the future. By following these tips and tricks, you can successfully complete your drywall repair project and improve the look and feel of your home.
Call our
drywall repair specialists at
804-596-6255 for more helpful tips or schedule us to assist you!
You might also like
Get Instant Quote